¶ EarthRanger
EarthRanger is an interactive map with built in analysing tools, the option to collect and write reports, set up alerts (e.g., fence breakout alert), plan patrols and extract collected data. On this wiki page we describe and explain all aspects of EarthRanger relevant to the Smart Parks stack. For more details on all other aspects of EarthRanger we'd like to refer to their written manuals. You can access these manuals by signing up to their community
Within the Smart Parks Stack the integration to EarthRanger needs to be properly configured to offer the wide variety of features.
¶ EarthRanger crash course
¶ The basics
- EarthRanger terminology
- Users → people who use EarthRanger
- Subjects → the entities you manage in ER, e.g. animals and vehicles
- Permission → who can see and do what
- Permission sets → the various administrative permissions that can be assigned to ER users
- Administrators → people who can and have the permission to perform administrative actions, e.g. adding users, managing subjects or assigning permissions
- Features → stationary objects e.g., area boundary, roads or ranger camps
¶ User
- Observations
¶ Observations
¶ Set-up integration between Node-RED and EarthRanger
- Events
- Two-way messaging
¶ Admin
- Node-RED Integration
- Subject observation data extraction
¶ Node-Red Integration
¶ Set-up integration between Node-RED and EarthRanger
- Prepare the Node-RED setup first → more information can be found in the Node-RED section.
- Add system user:
- User Accounts > Users > Add User
- Add Application
- Django oauth toolkit > Applications > Add Application
- Client id → copy this id and enter it into the earthranger connection node
- User → select the user that was created in the previous step and copy it into the earthranger connection node
- Client type → Public
- Authorization grant type → Resource owner password-based → this is the password for the user that was created in the previous step. Enter this password into the earthranger connection node
- Django oauth toolkit > Applications > Add Application
- Enable two-way messaging
- Observations > Source Providers > smartparks
- Provider configurations > Two-way messaging > Enable
- Adapter Type: smart-integrate-adapter
- URL: <location of the Node-RED API endpoint>
- API key: <add secure key>
- Enable subject details configuration
- Enabled subject details will be show in the map EarthRanger view > more details
- Observations > Source Providers > smartparks
- Subject Details Configuration
- Enable all items in the Available Data kolom
- Add custom label in the label kolom
- Add custom units in the units label
¶ Subject observation data extraction
¶ Export historic subject data from EarthRanger
- Go to the admin site ‘yoursitename’.pamdas.org/admin and login
- Find subject data:
- Go to Observations > Subjects
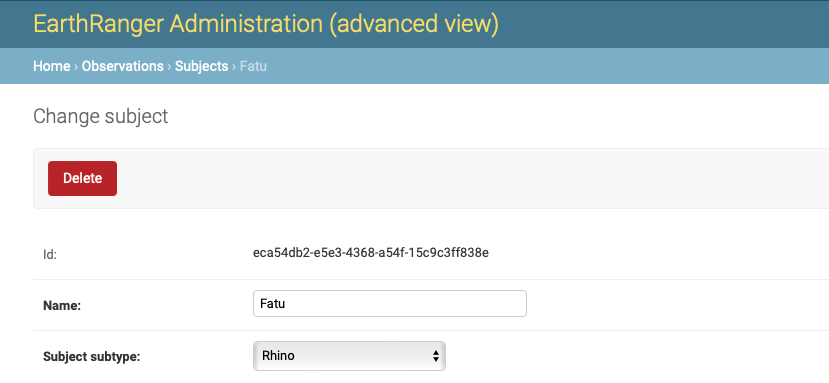
- Select subject type to change → find and select the right subject
- Home > Observations > Subjects > ‘nameofsubject'

- Download subject data:
- Scroll down the Change subject page
- Here you see the Latests Observations
- Above the red “delete” button you see “see more observations of this subject here”
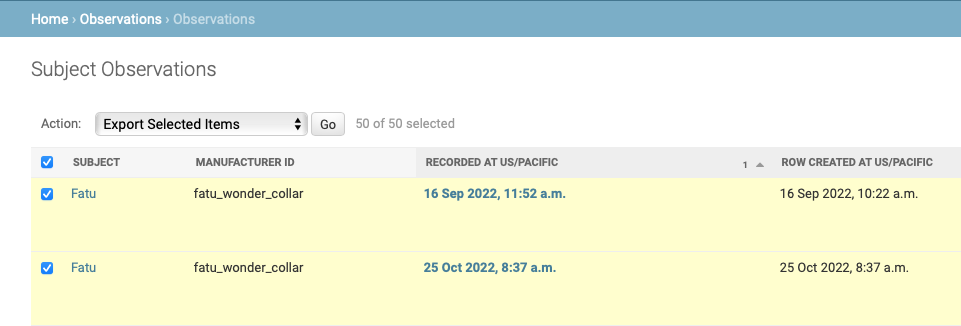
- Click “here” → a new window opens with all Subject Observations
- Select all observations by ticking the box (blue) left of “subject” and select “Export Selected Items” using the Action fold out options → click “GO”

- If there are more than 100 Subject Observations and you want all of them selected: “Select all # observations”

- The observations will be downloaded as CSV. file.
¶ Adding features
¶ Manually adding features without the use of Shapefile/GeoJson file
We do recommend using Shapefile/GeoJson files to import features because you can add multiple points at the same time plus there is less room for error. However, it is possible to add features into ER manually without a Shapefile/GeoJson file.
- Go to the admin site ‘yoursitename’.pamdas.org/admin and login
- Find ‘Add feature’ option
- Go to Map Layers > Features
- In the right top corner you see ‘ADD FEATURE’ in a small grey bar with a + icon
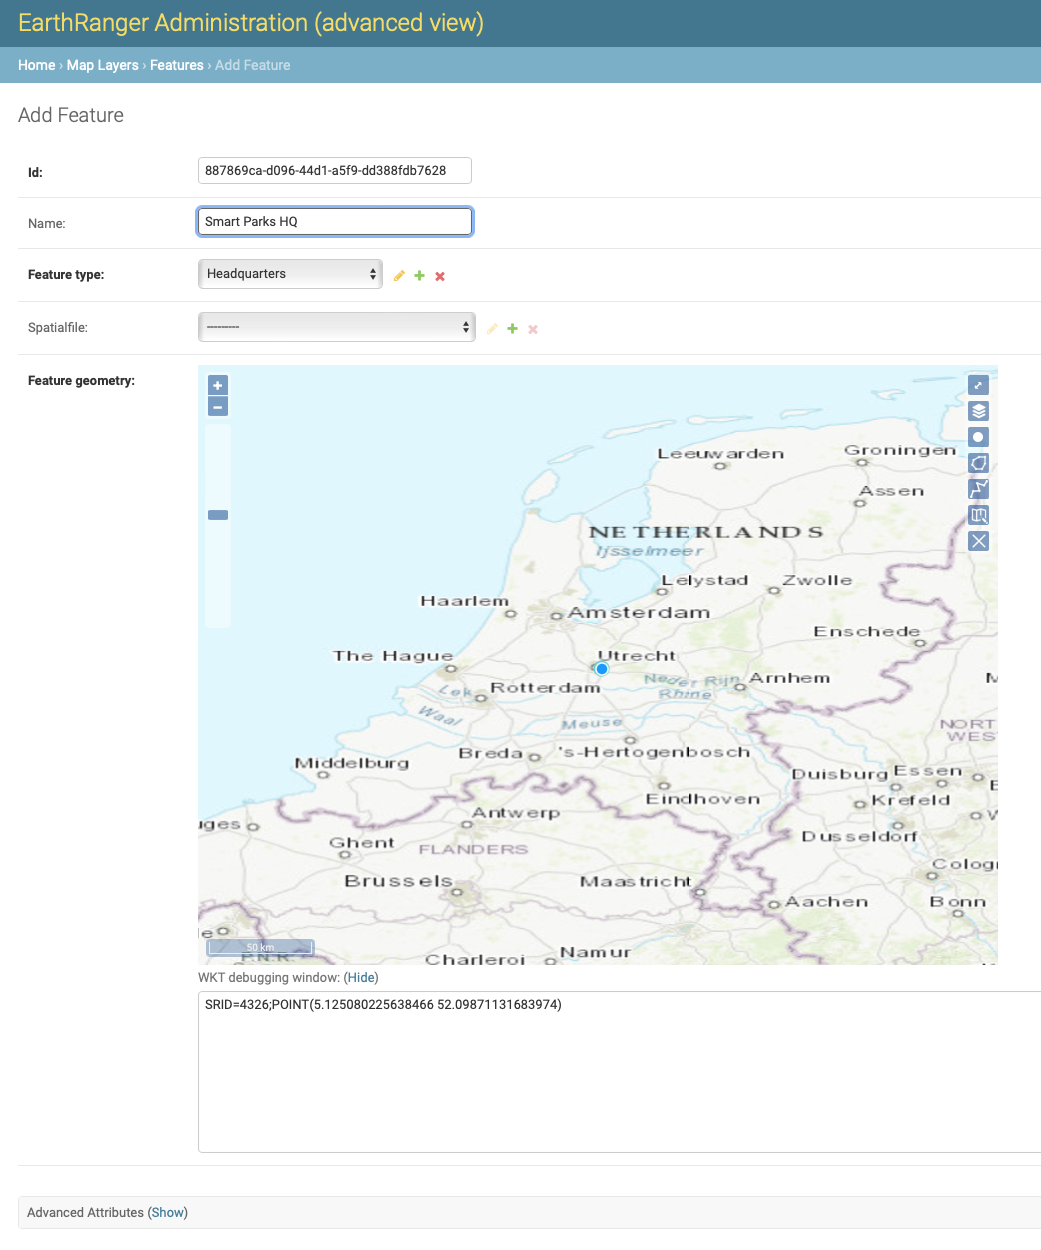
- The below window opens
- Id: automatically generated by ER
- Name: write down the name of the feature (e.g. Smart Parks HQ, Ranger Camp X, waterhole X)
- Feature type: select which feature type, this determines the icon you will see on the map
- Spatialfile: we do not use one with this method
- Select the location of the desired feature on the map
- In the right top corner of the map, select the point (3rd blue square from the top)
- make sure to unfold the: WKT debugging window underneath the map → click (Show)
- Here you see: SRID=4326;POINT(LONGITUDE LATITUDE) coordinates → the SRID is unique for every point you add
- You can edit these lat long coordinates (DEG) to match the exact location of your point. Notice: the latitude and longitude are switched (long lat instead), make sure to add your coordinates accordingly!
- Scroll down and click “save” in the right below corner
- Unfortunately, you have to add each point separately. To add multiple points you will need to use a Shapefile/GeoJson file
