¶ RangerEdge Production
<THIS PAGE IS UNDER CONSTRUCTION>
¶ How to assemble the RangerEdge devices
The RangerEdge devices are assembled by the Smart Parks team. The below section describes a step-by-step explanation on how this is done.
¶ Parts
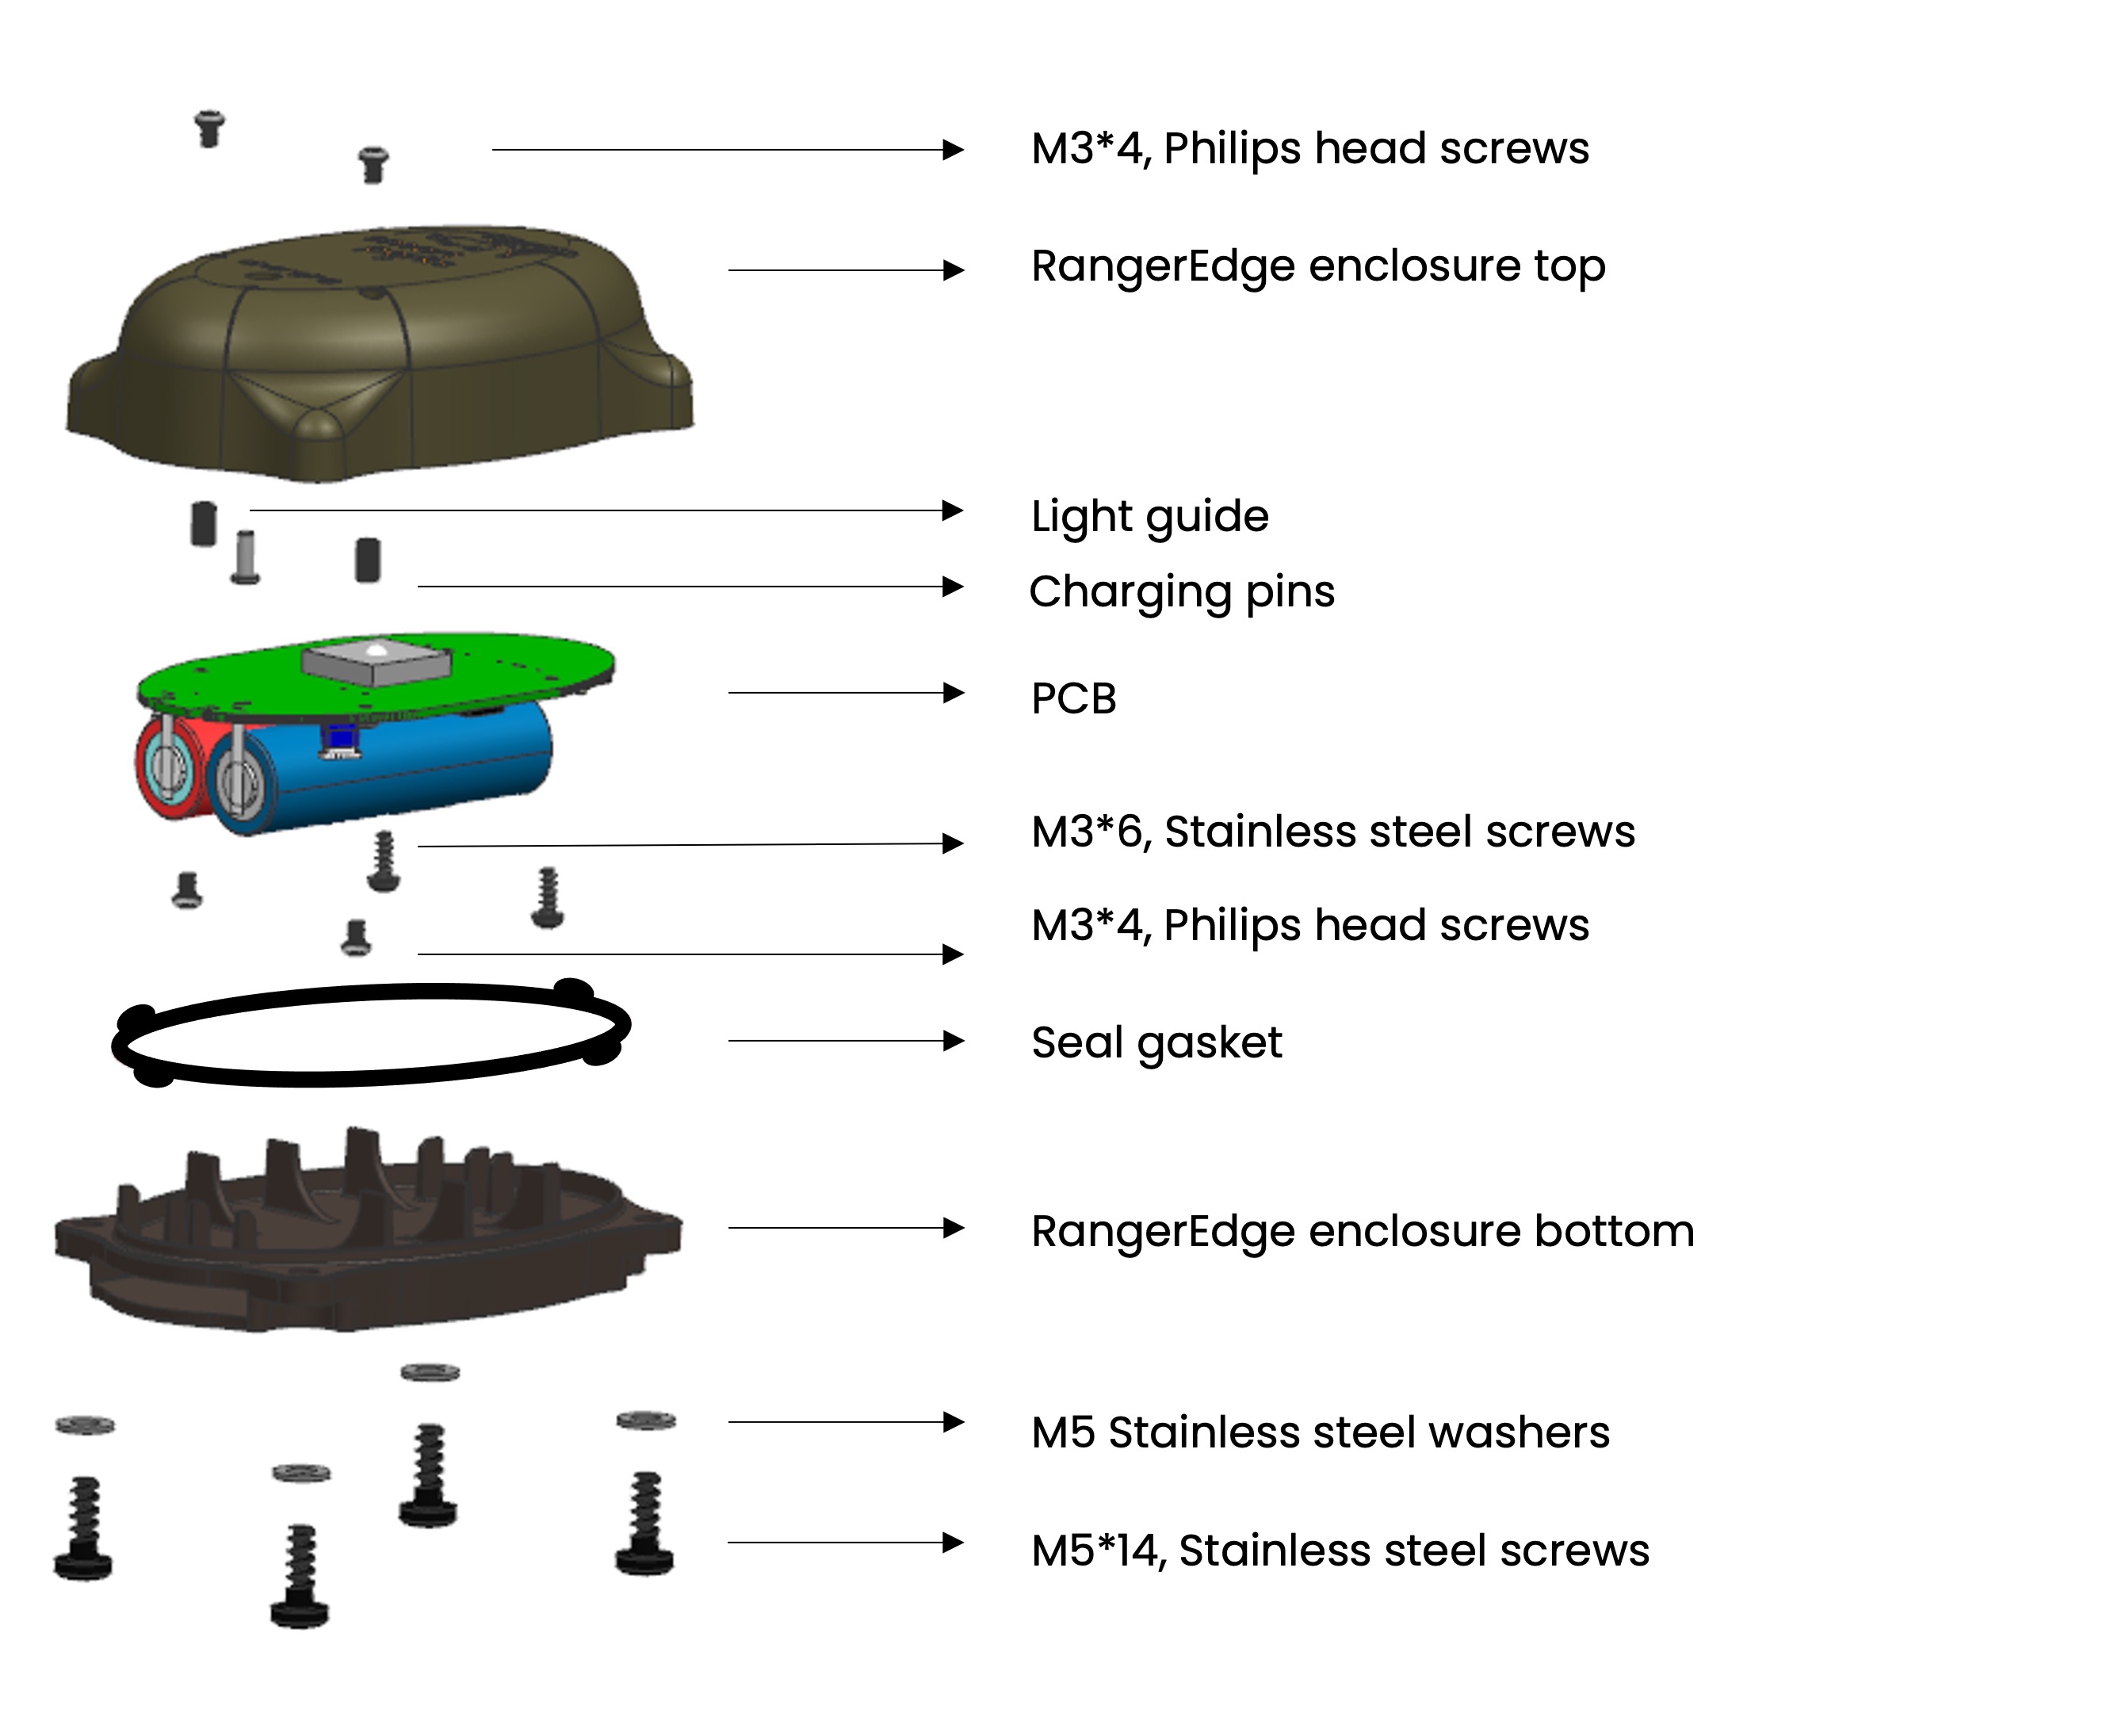
- Injection mould enclosure top and bottom
- PCB with attached batteries
- 4 x M3*4 Philips head screws
- 4 x M5 washers
- 4 x M5*14 Stainless steel screws
- 2 x M3*6 Stainless steel screws
- Light guide φ5*8,6mm, silicone
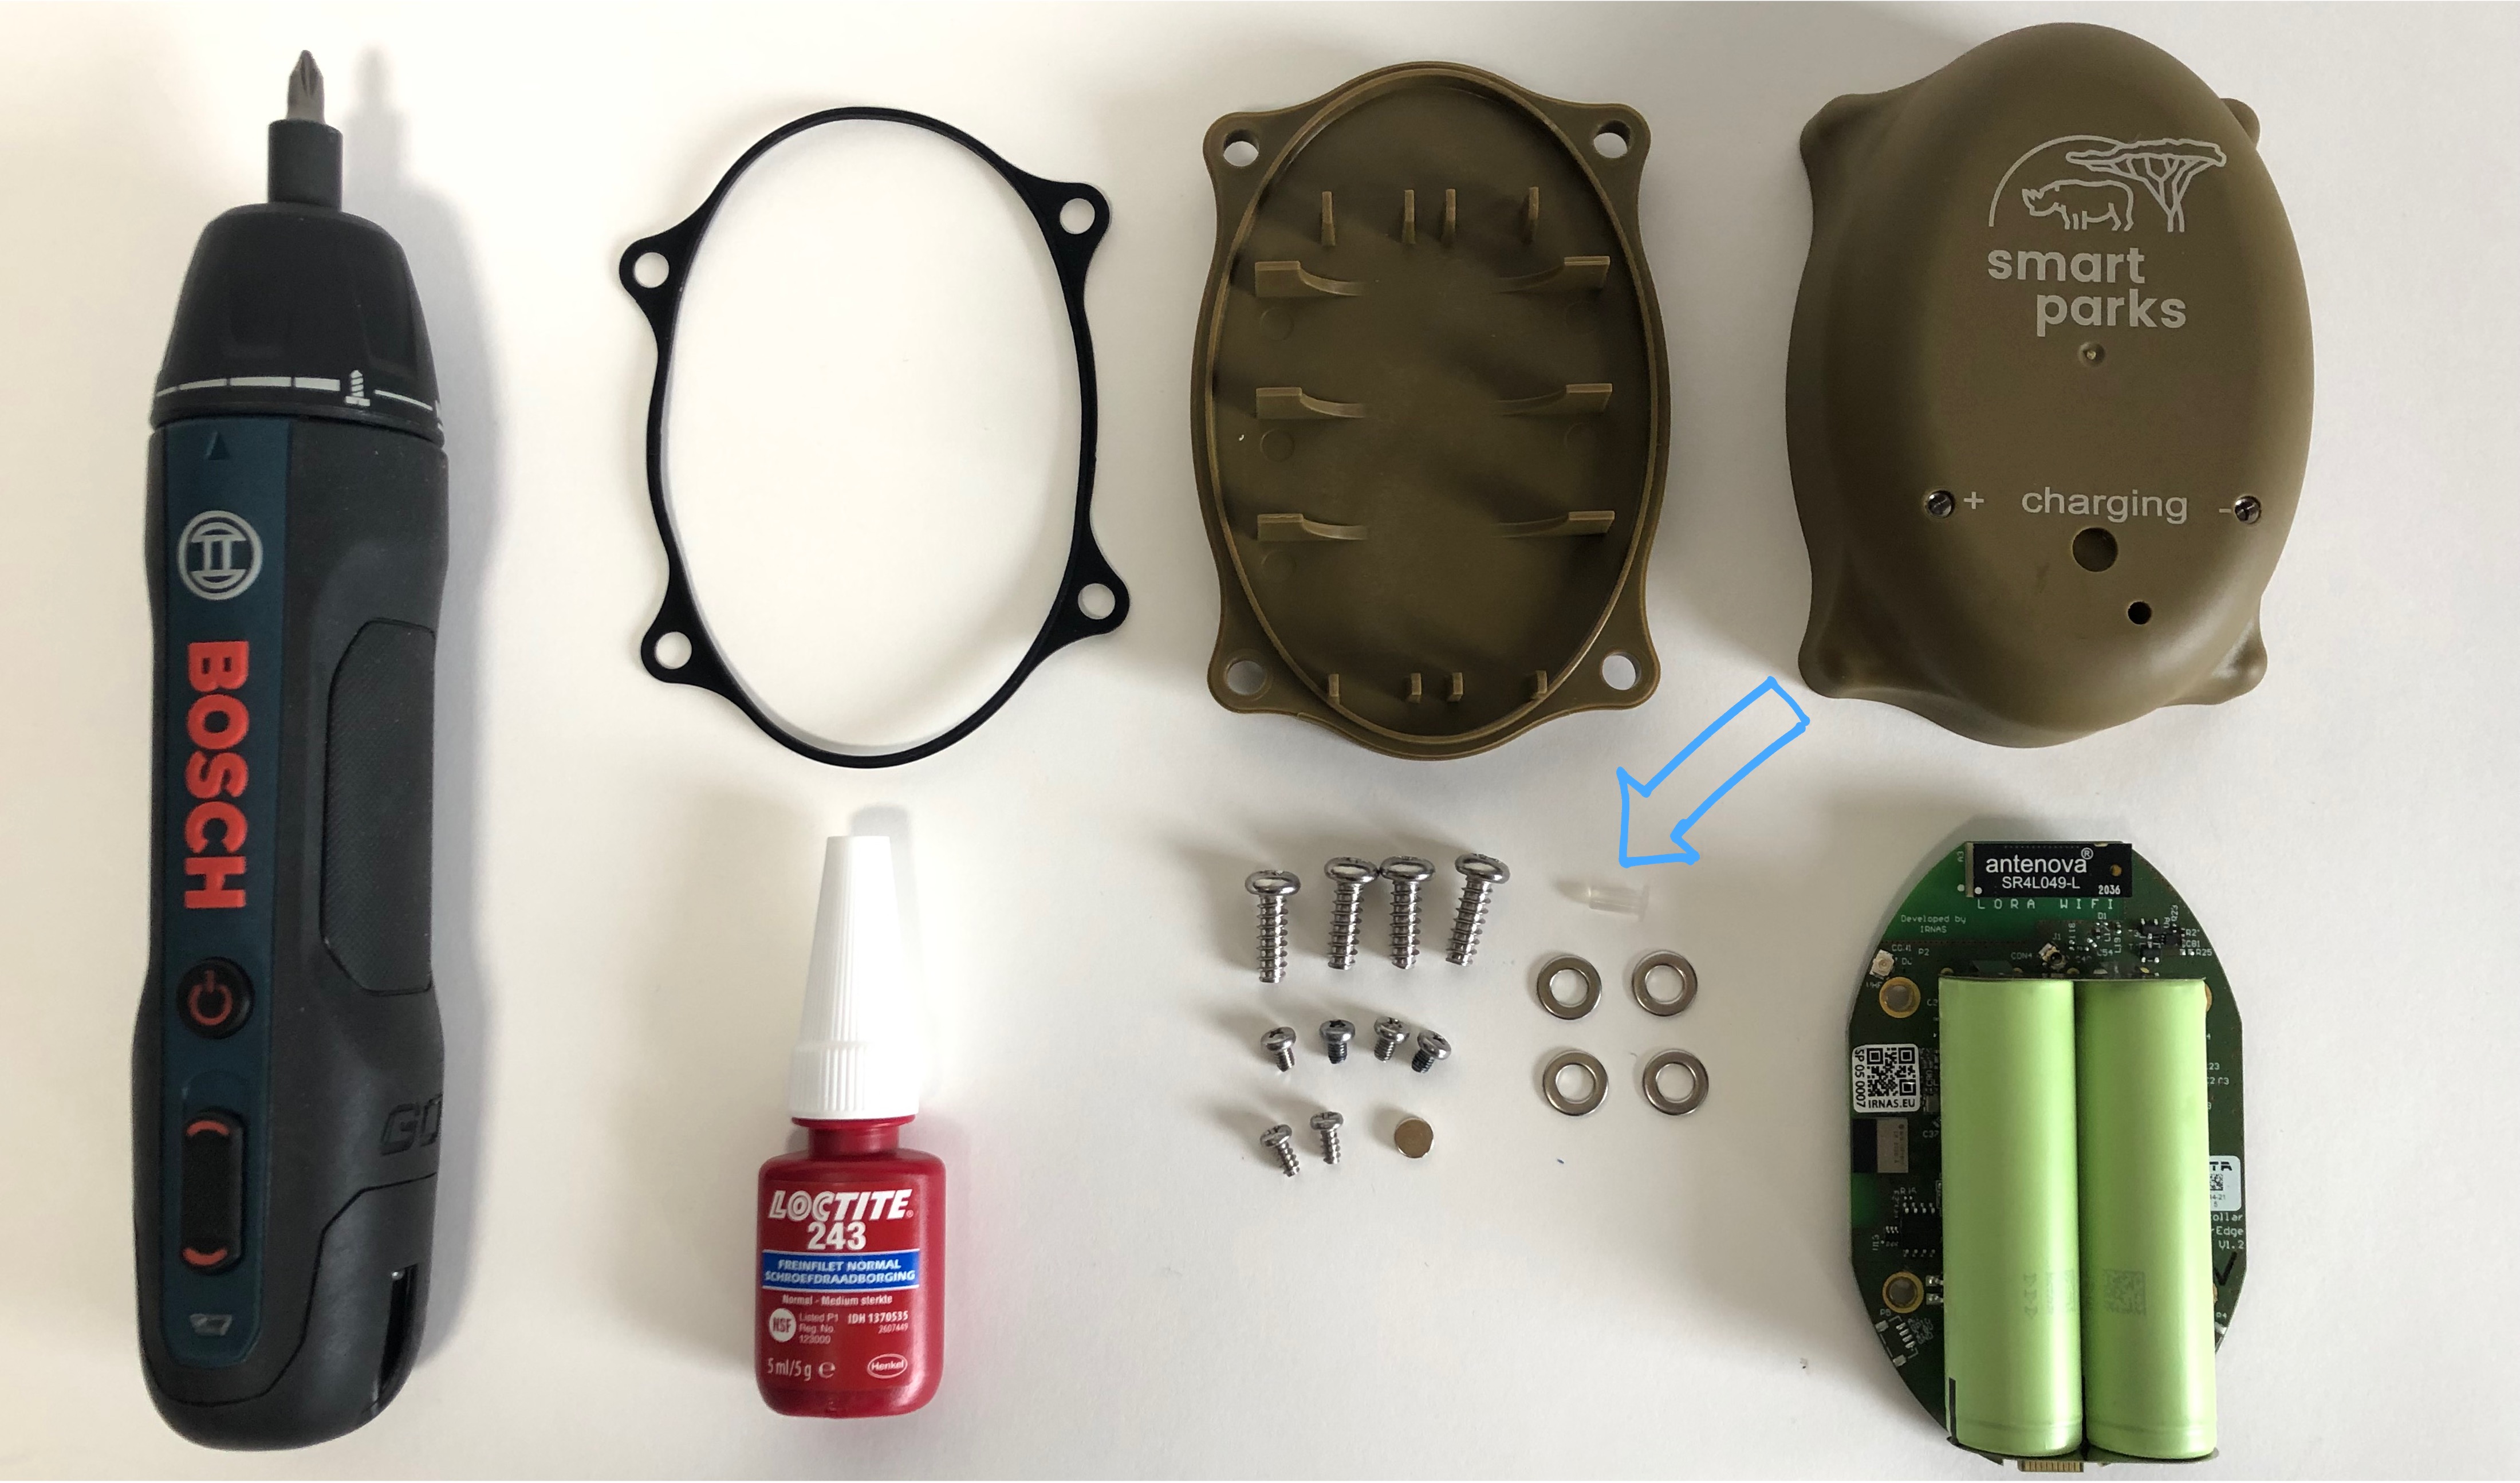
- Dish magnet 6*2,5 mm
- Seal gasket 105*71*2,2 mm
¶ Tools
- Bosch electric screwdriver
- Insert: crosshead S2 PHI
- NOTE: Torque setting may differ per step.
- Loctite 243
¶ Step 1. Place seal ring and light pipe
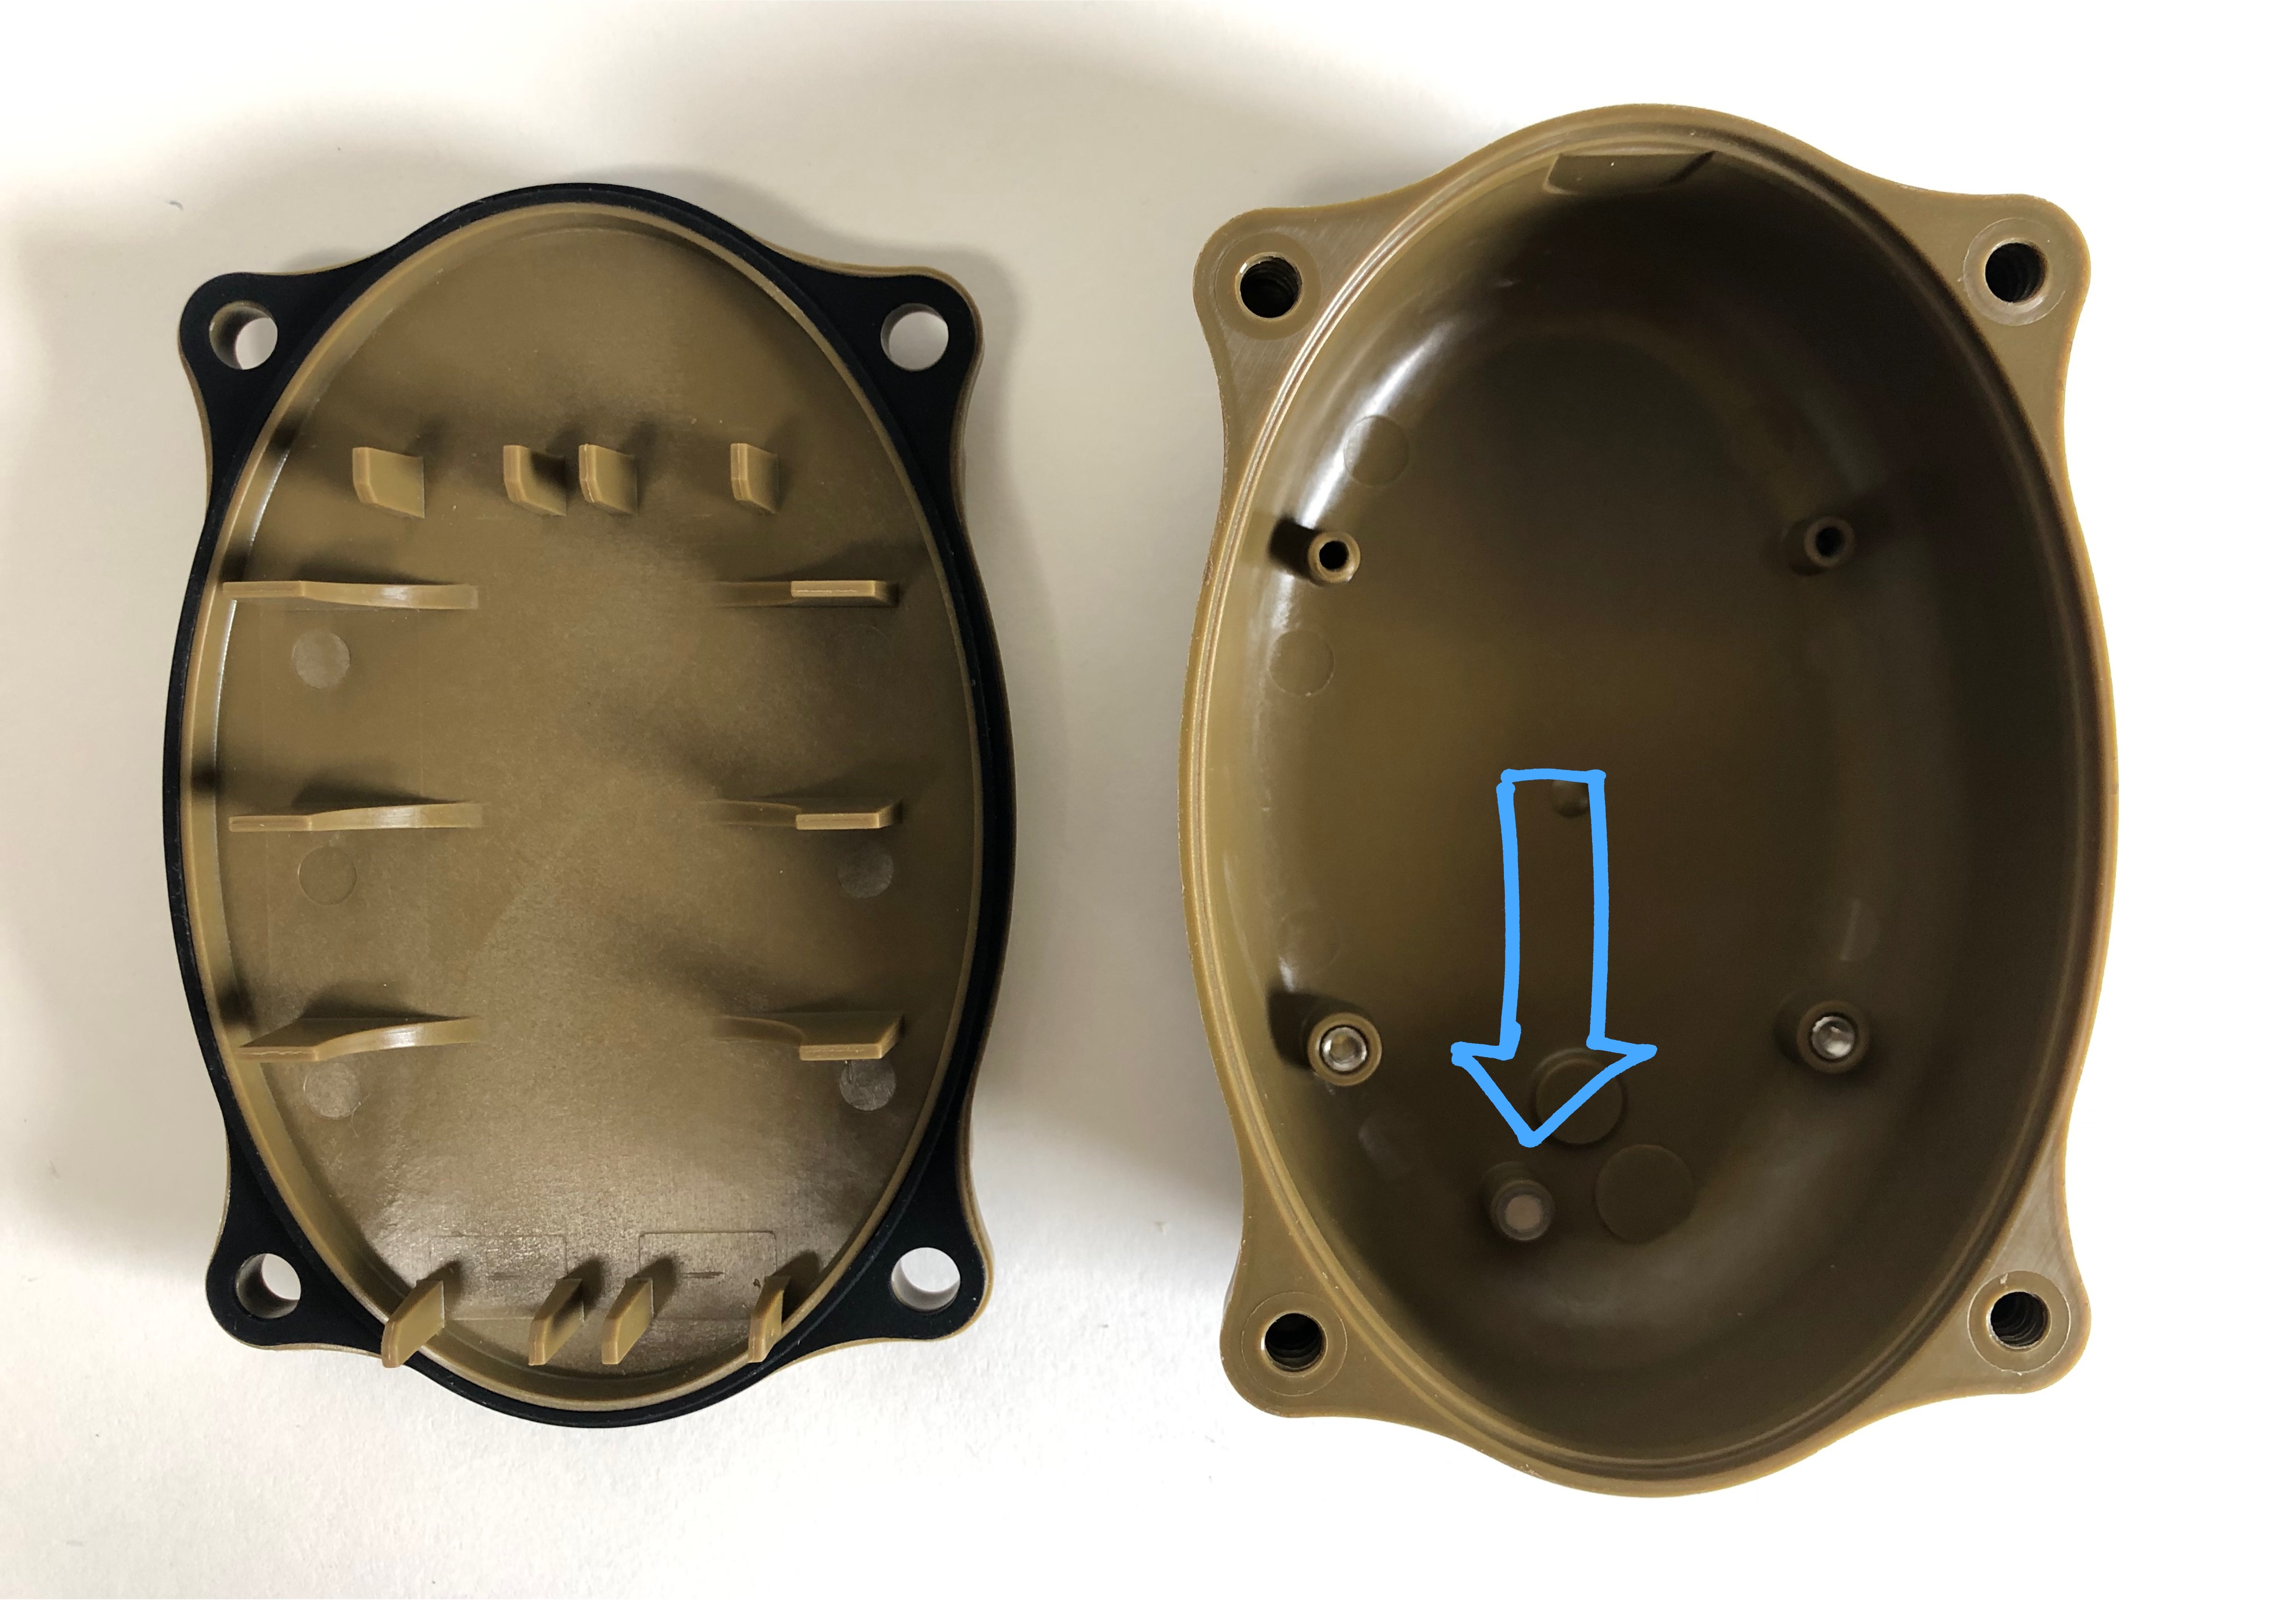
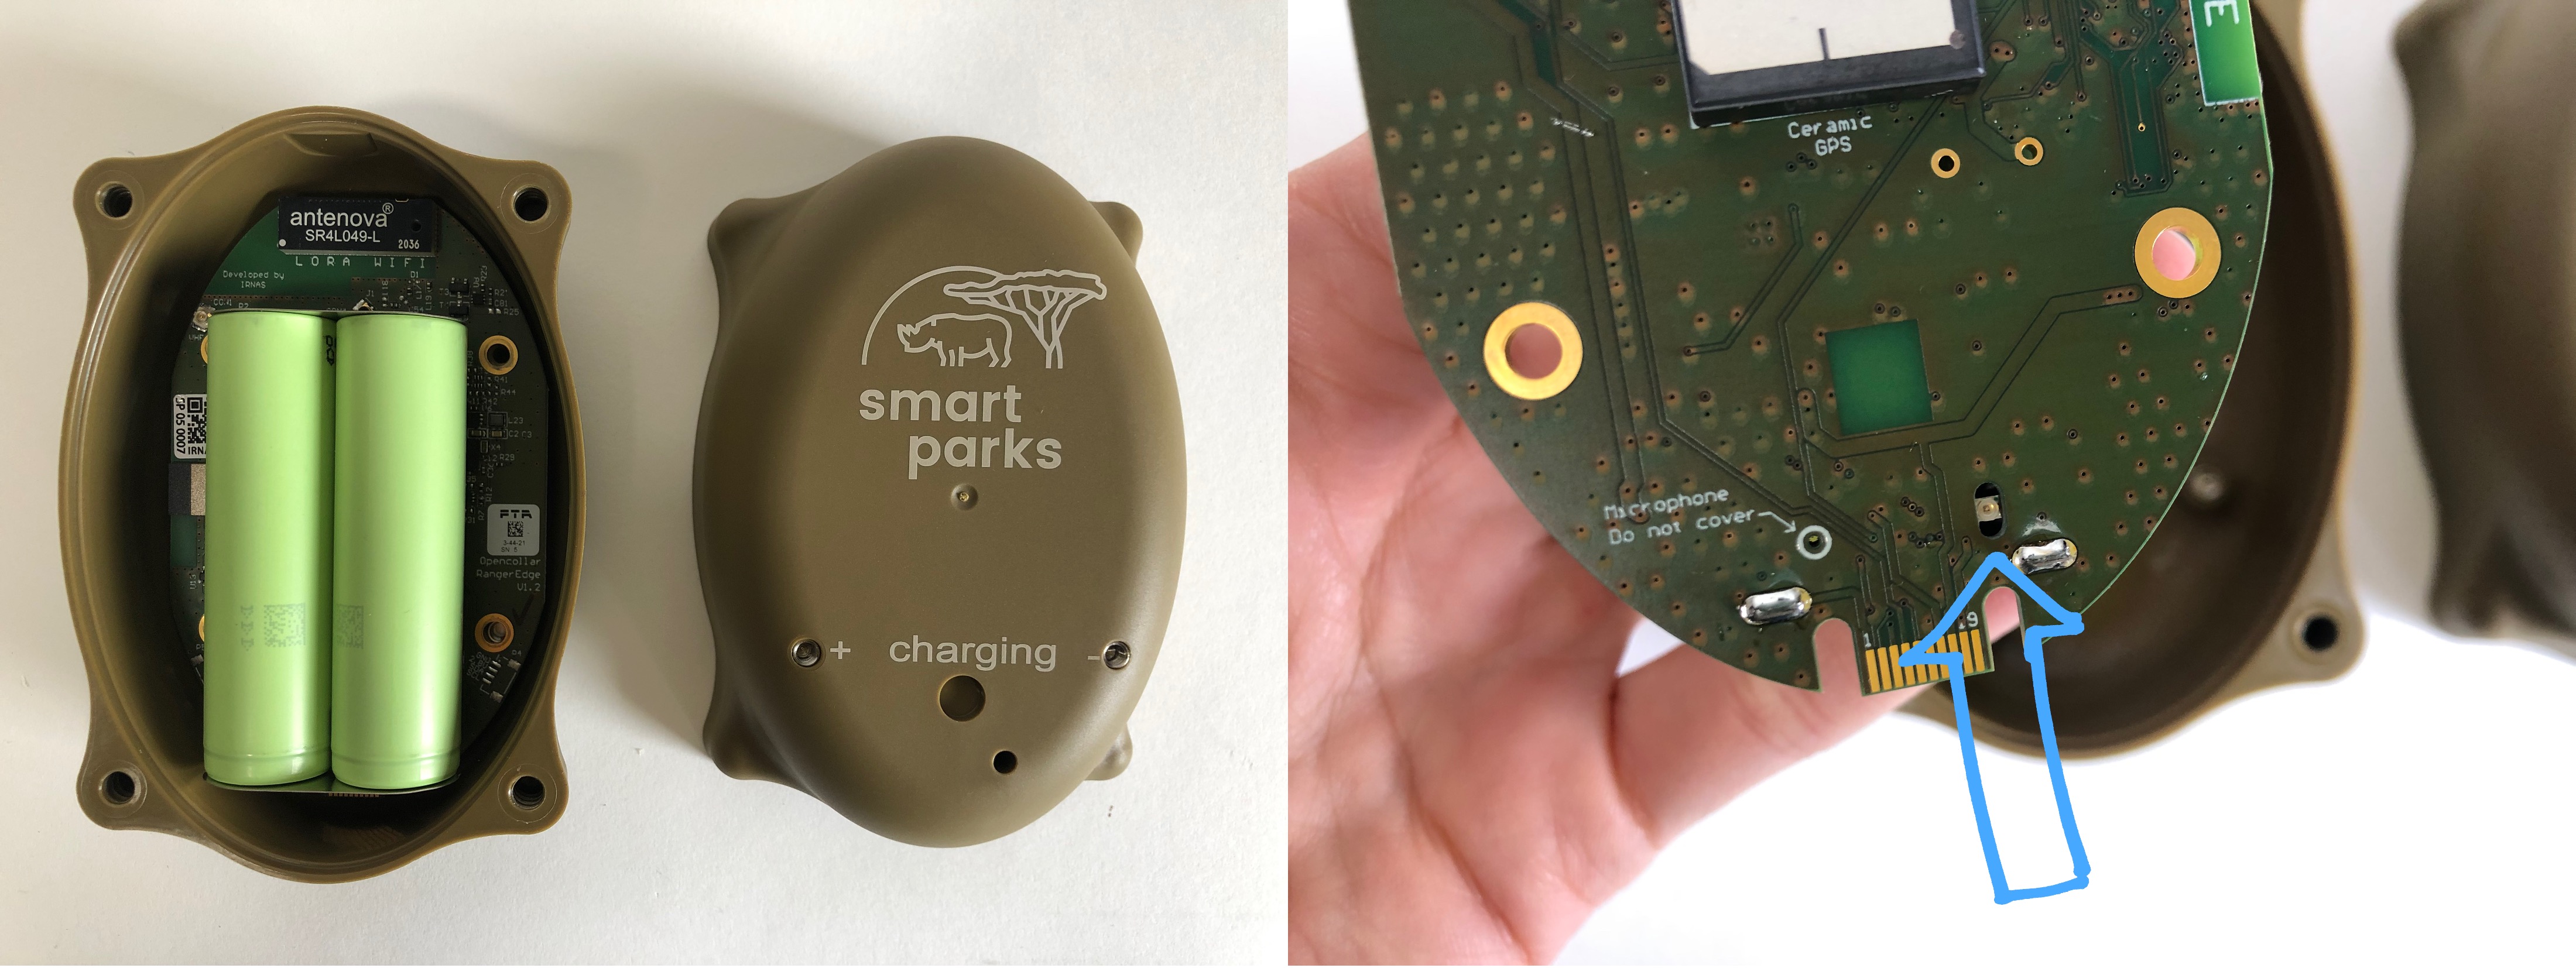
Place the seal gasket around the bottom of the RangerEdge enclosure. Place the see-through light guide from the inside of the enclosure top. Make sure the light guide (blue arrow) is pushed in properly.
¶ Step 2. Place the PCB in the enclosure
Place a complete PCB (with attached batteries) in the top of the enclosure. Make sure the PCB is placed with the correct orientation. A good check is wether the LED light (blue arrow) is placed on the light guide (previous step).
¶ Step 3. Screw the PCB in place
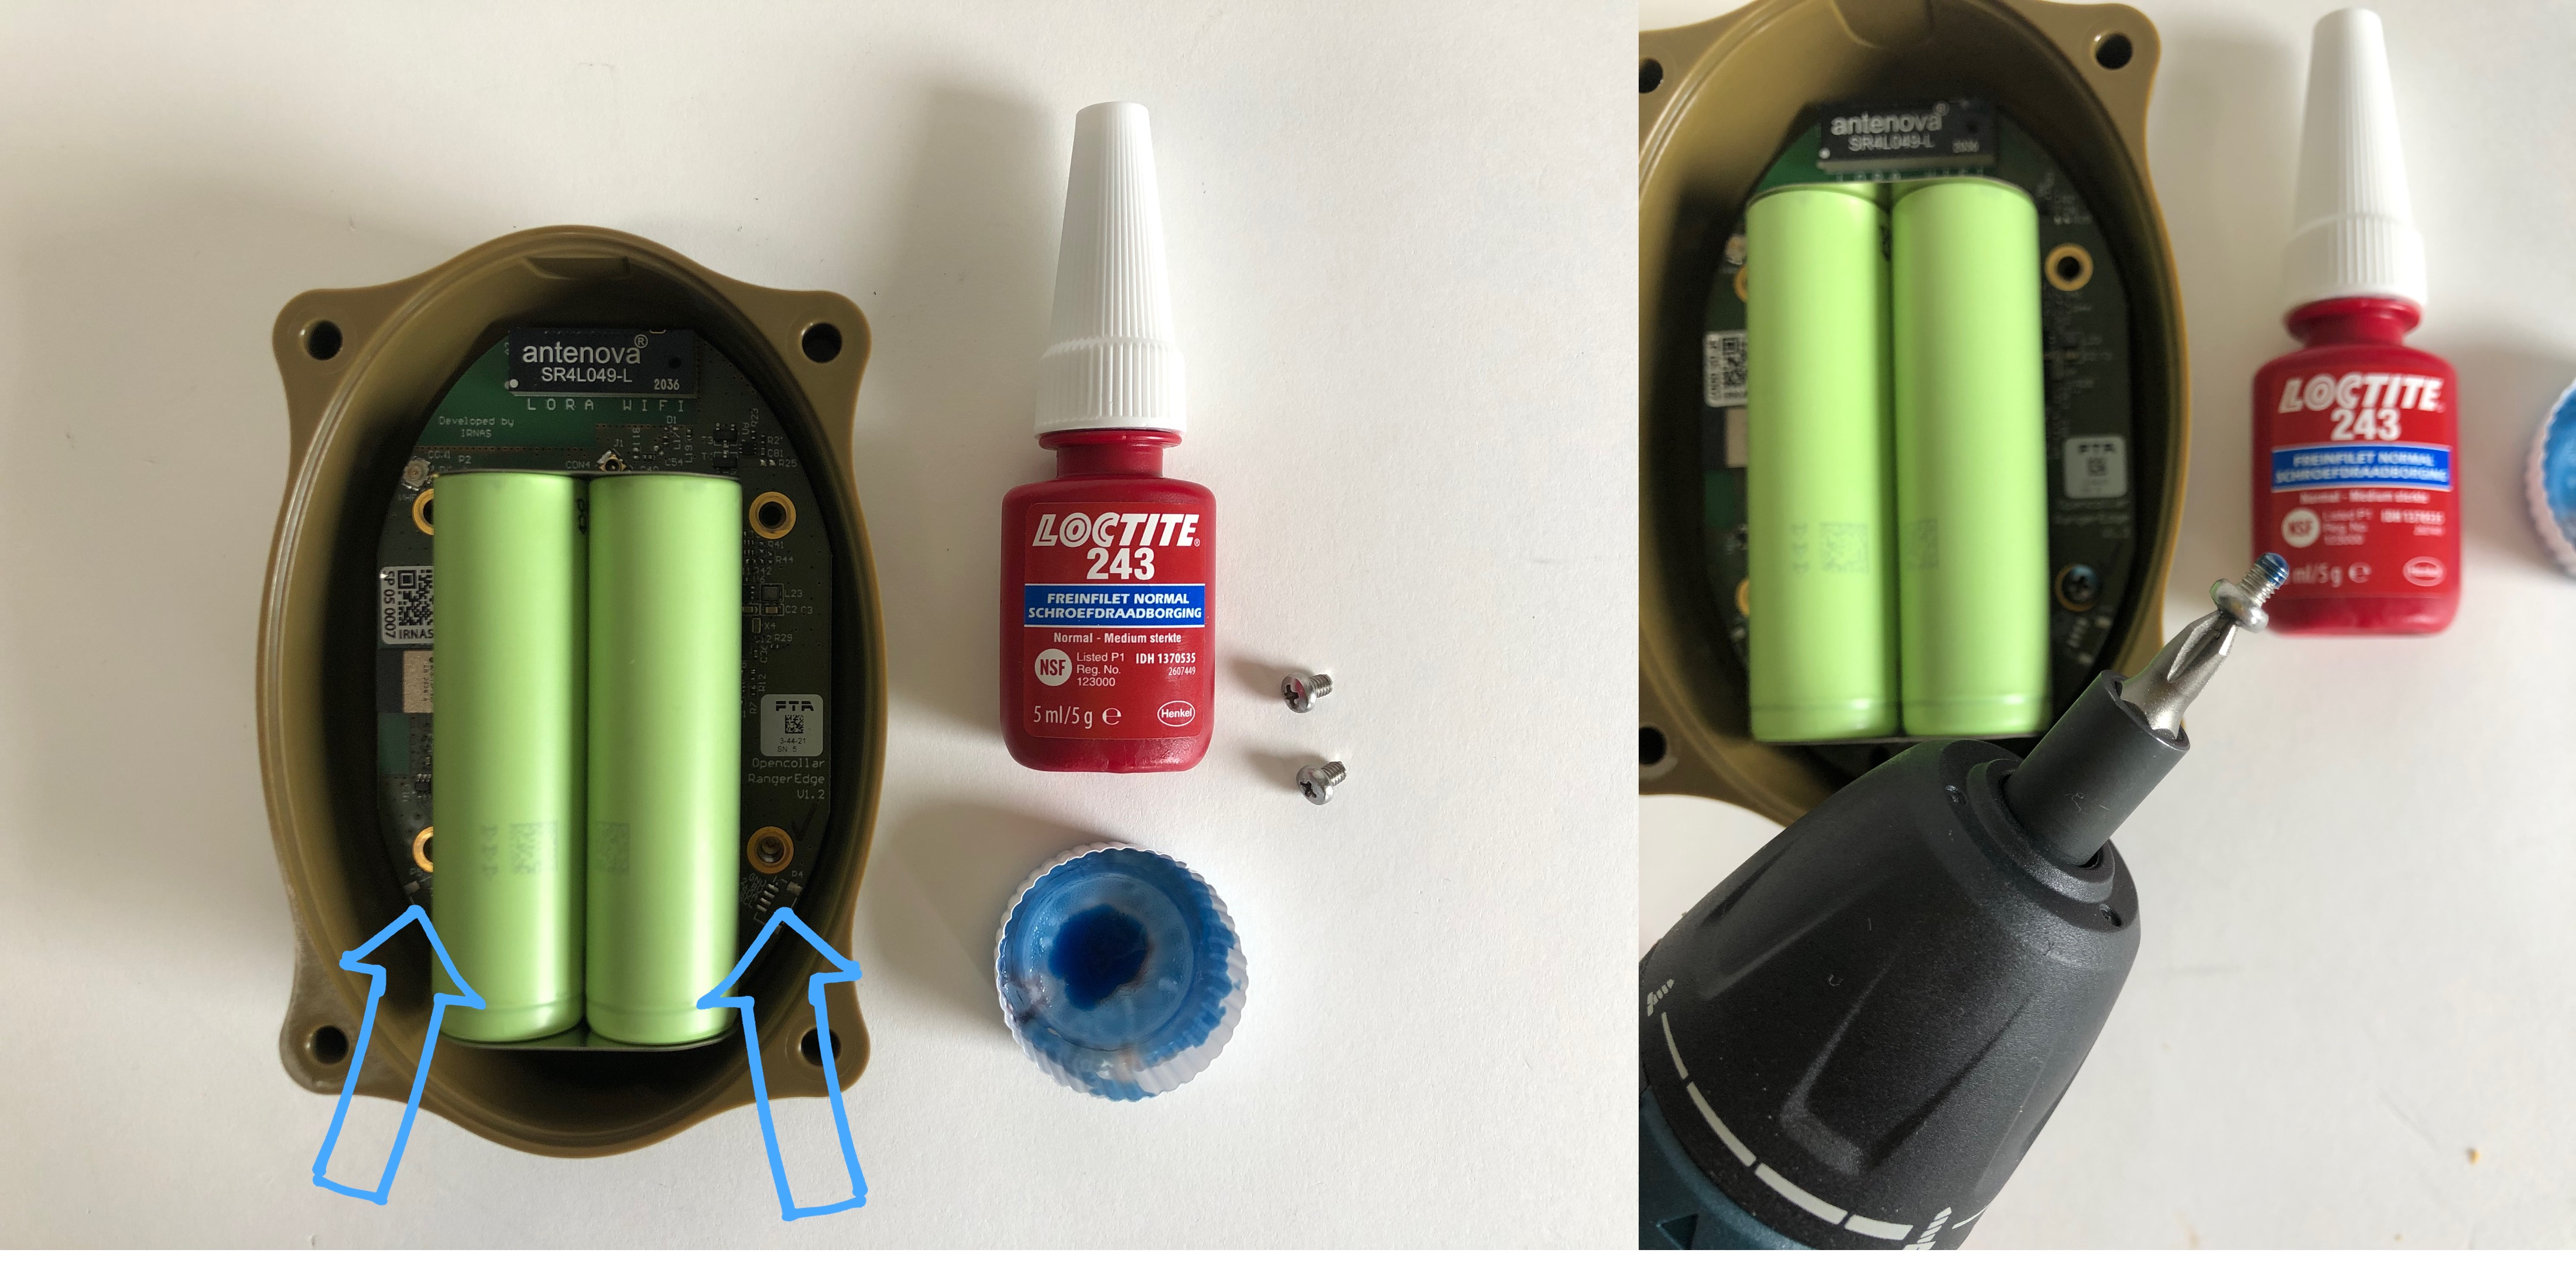
Using 2 x M3*4 screws, attach the PCB to the enclosure top. Use a little bit of loctite 243 on the M3*4 screws.
Using too much loctite 243 could result in potential charging issues.
- Bosch torque settings <INSERT BOSCH SETTINGS TO STANDARDISE PROCESS>
¶ Step 4. Screw the PCB in place
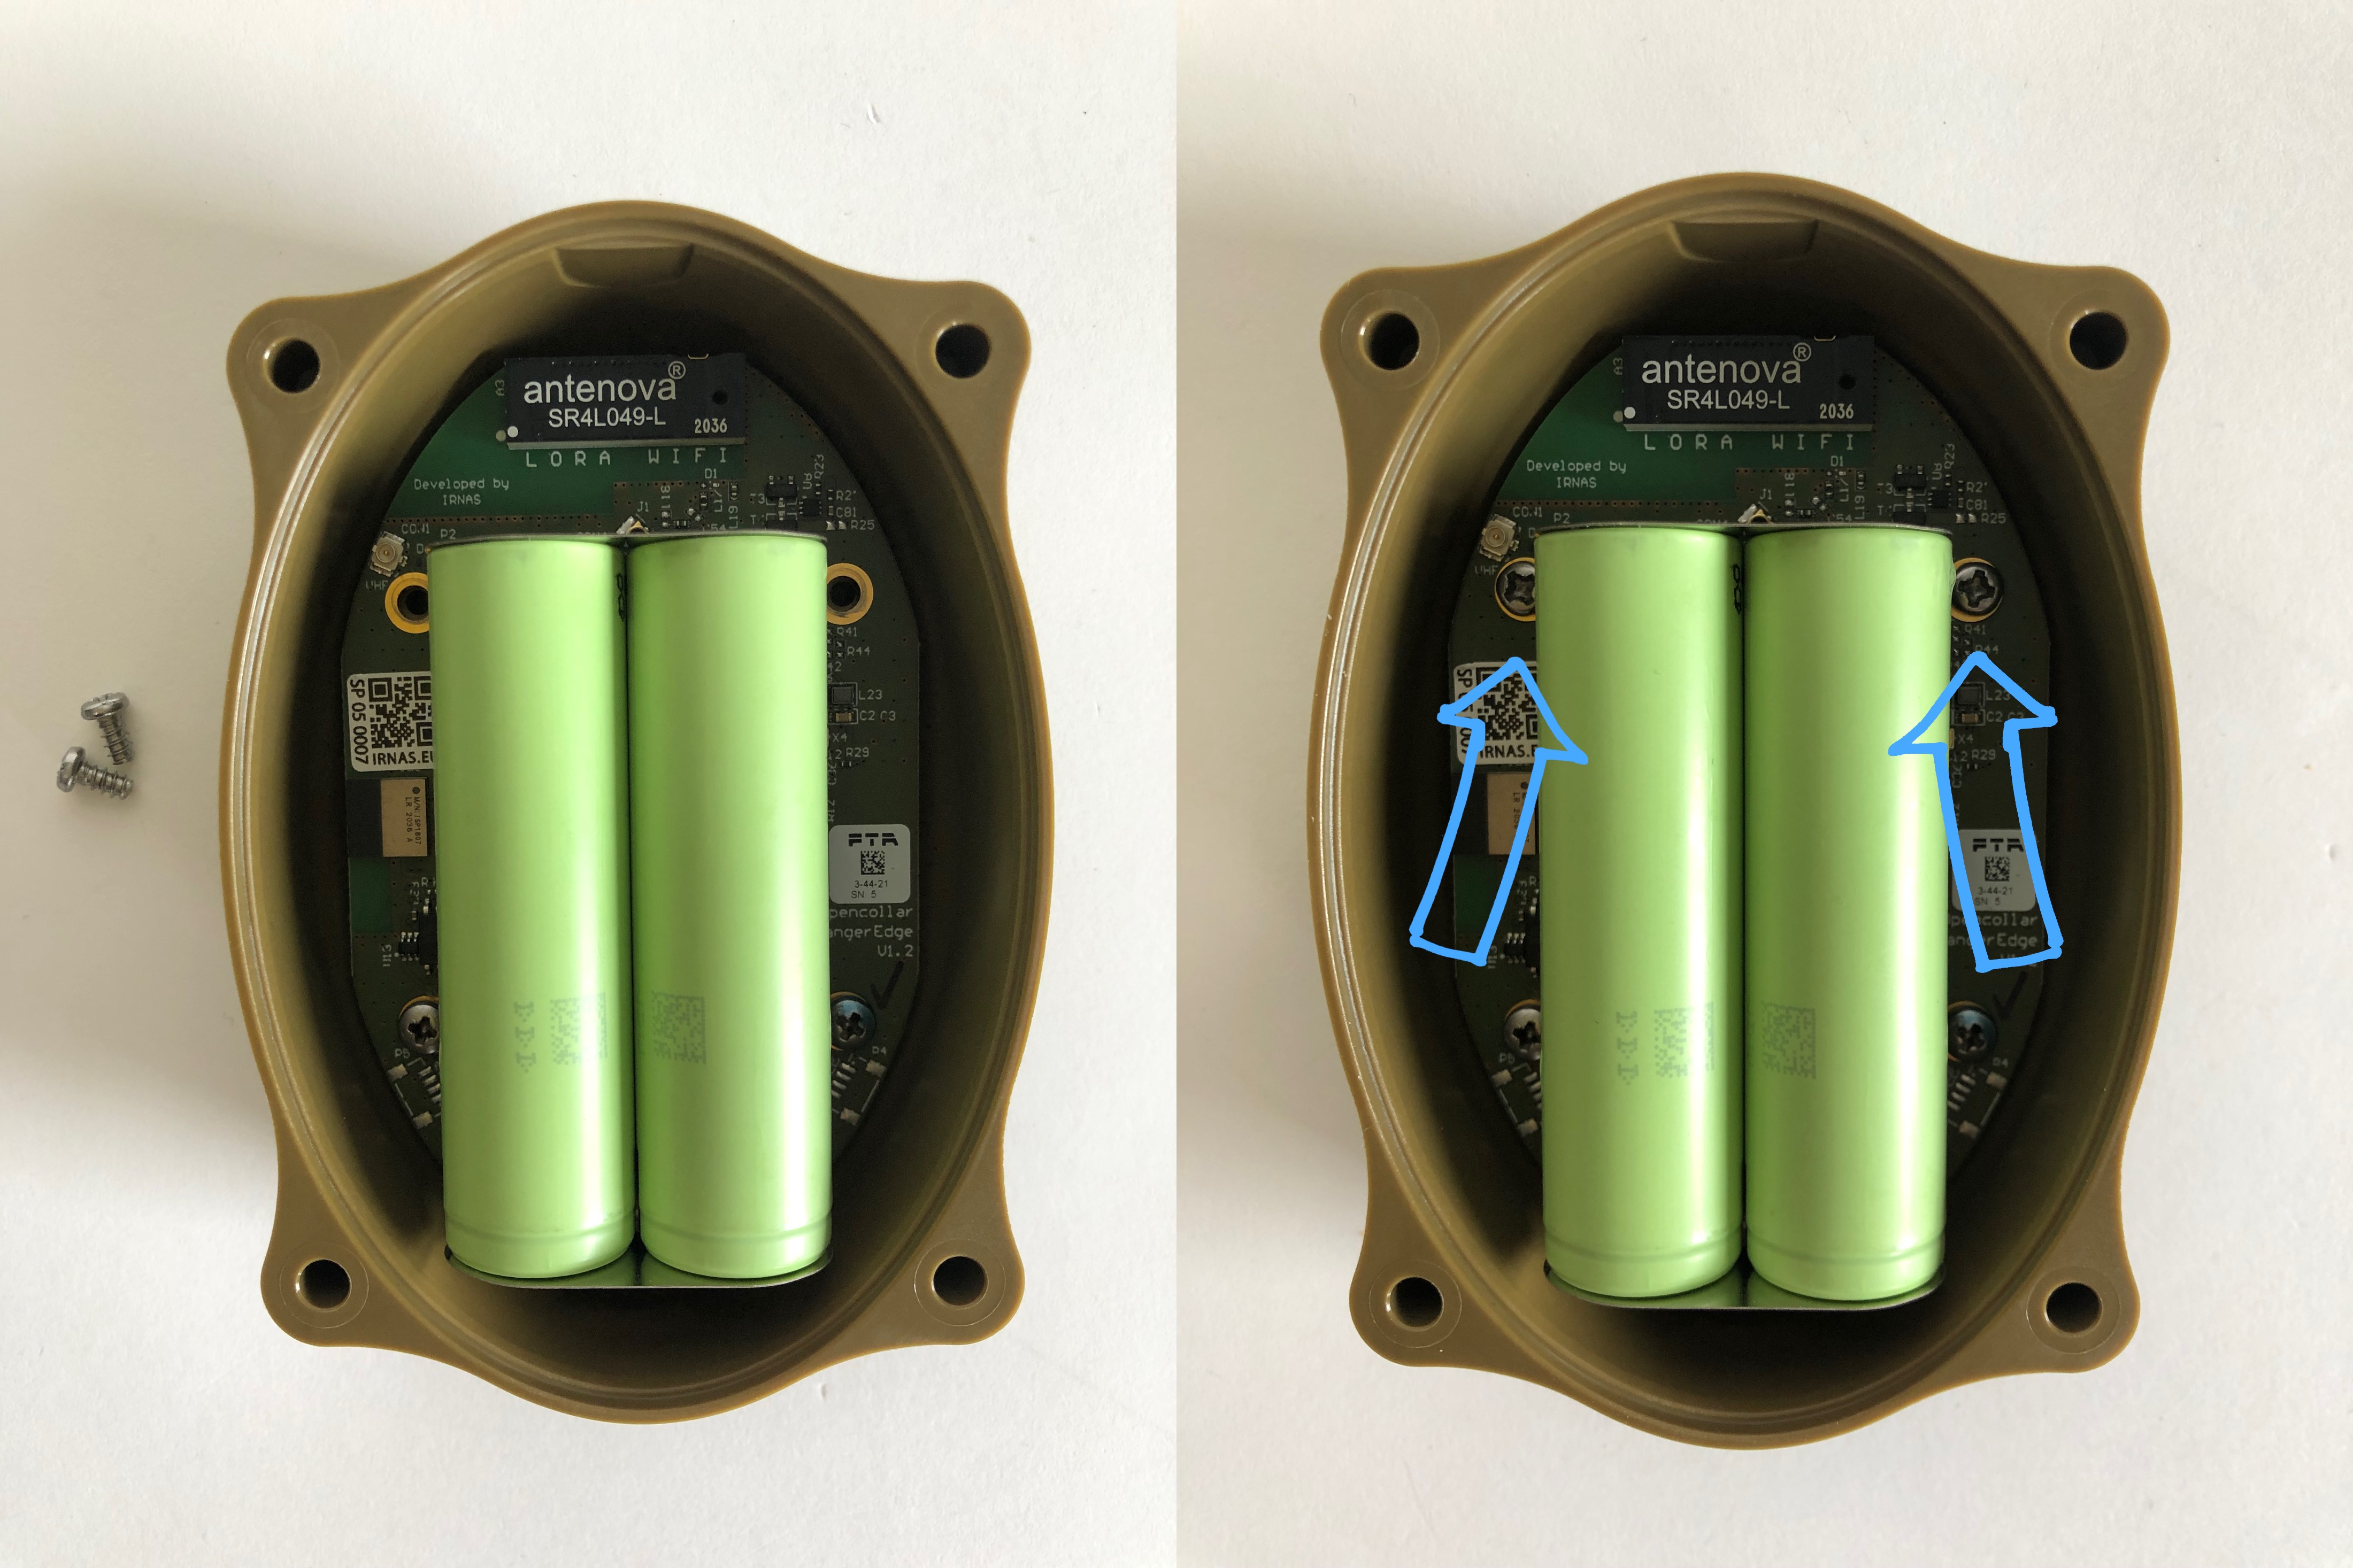
Using 2 x 3M*6 stainless steel screws, attach the top part of the PCB. Double check wether all 4 screws are secure and the PCB does not move.
- Bosch torque settings <INSERT BOSCH SETTINGS TO STANDARDISE PROCESS>
¶ Step 5. Close the enclosure
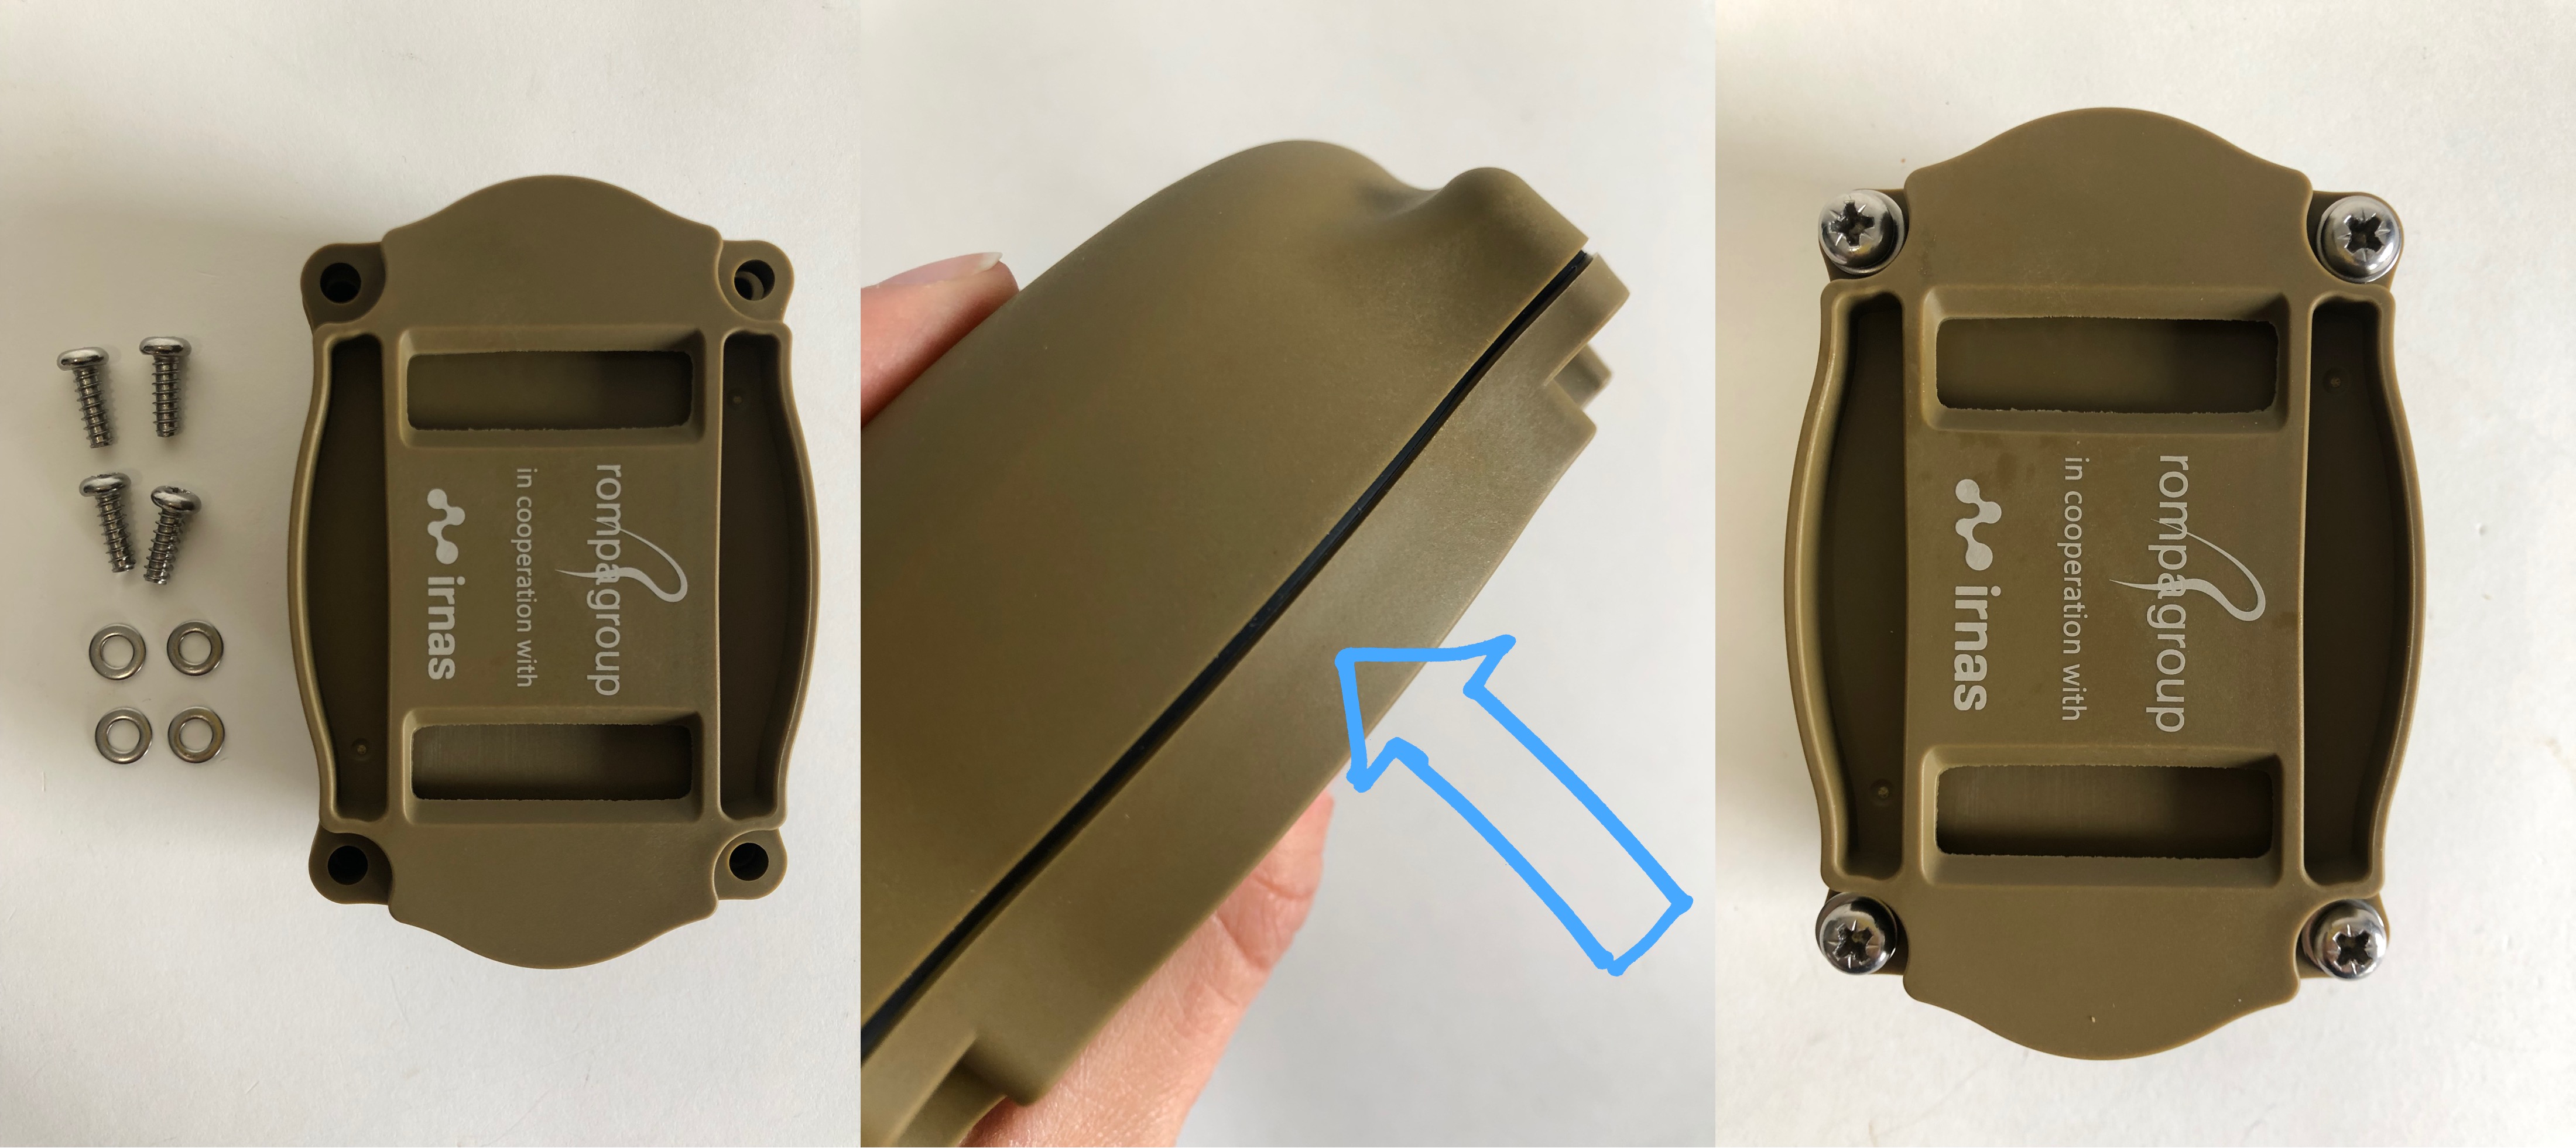
Close the RangerEdge by putting the top and bottom together. Make sure the plastic seal stays in place. Close the enclosure using 4 M5*14 stainless steel screws and 4 M5 washers.
¶ Step 6. Finalising step
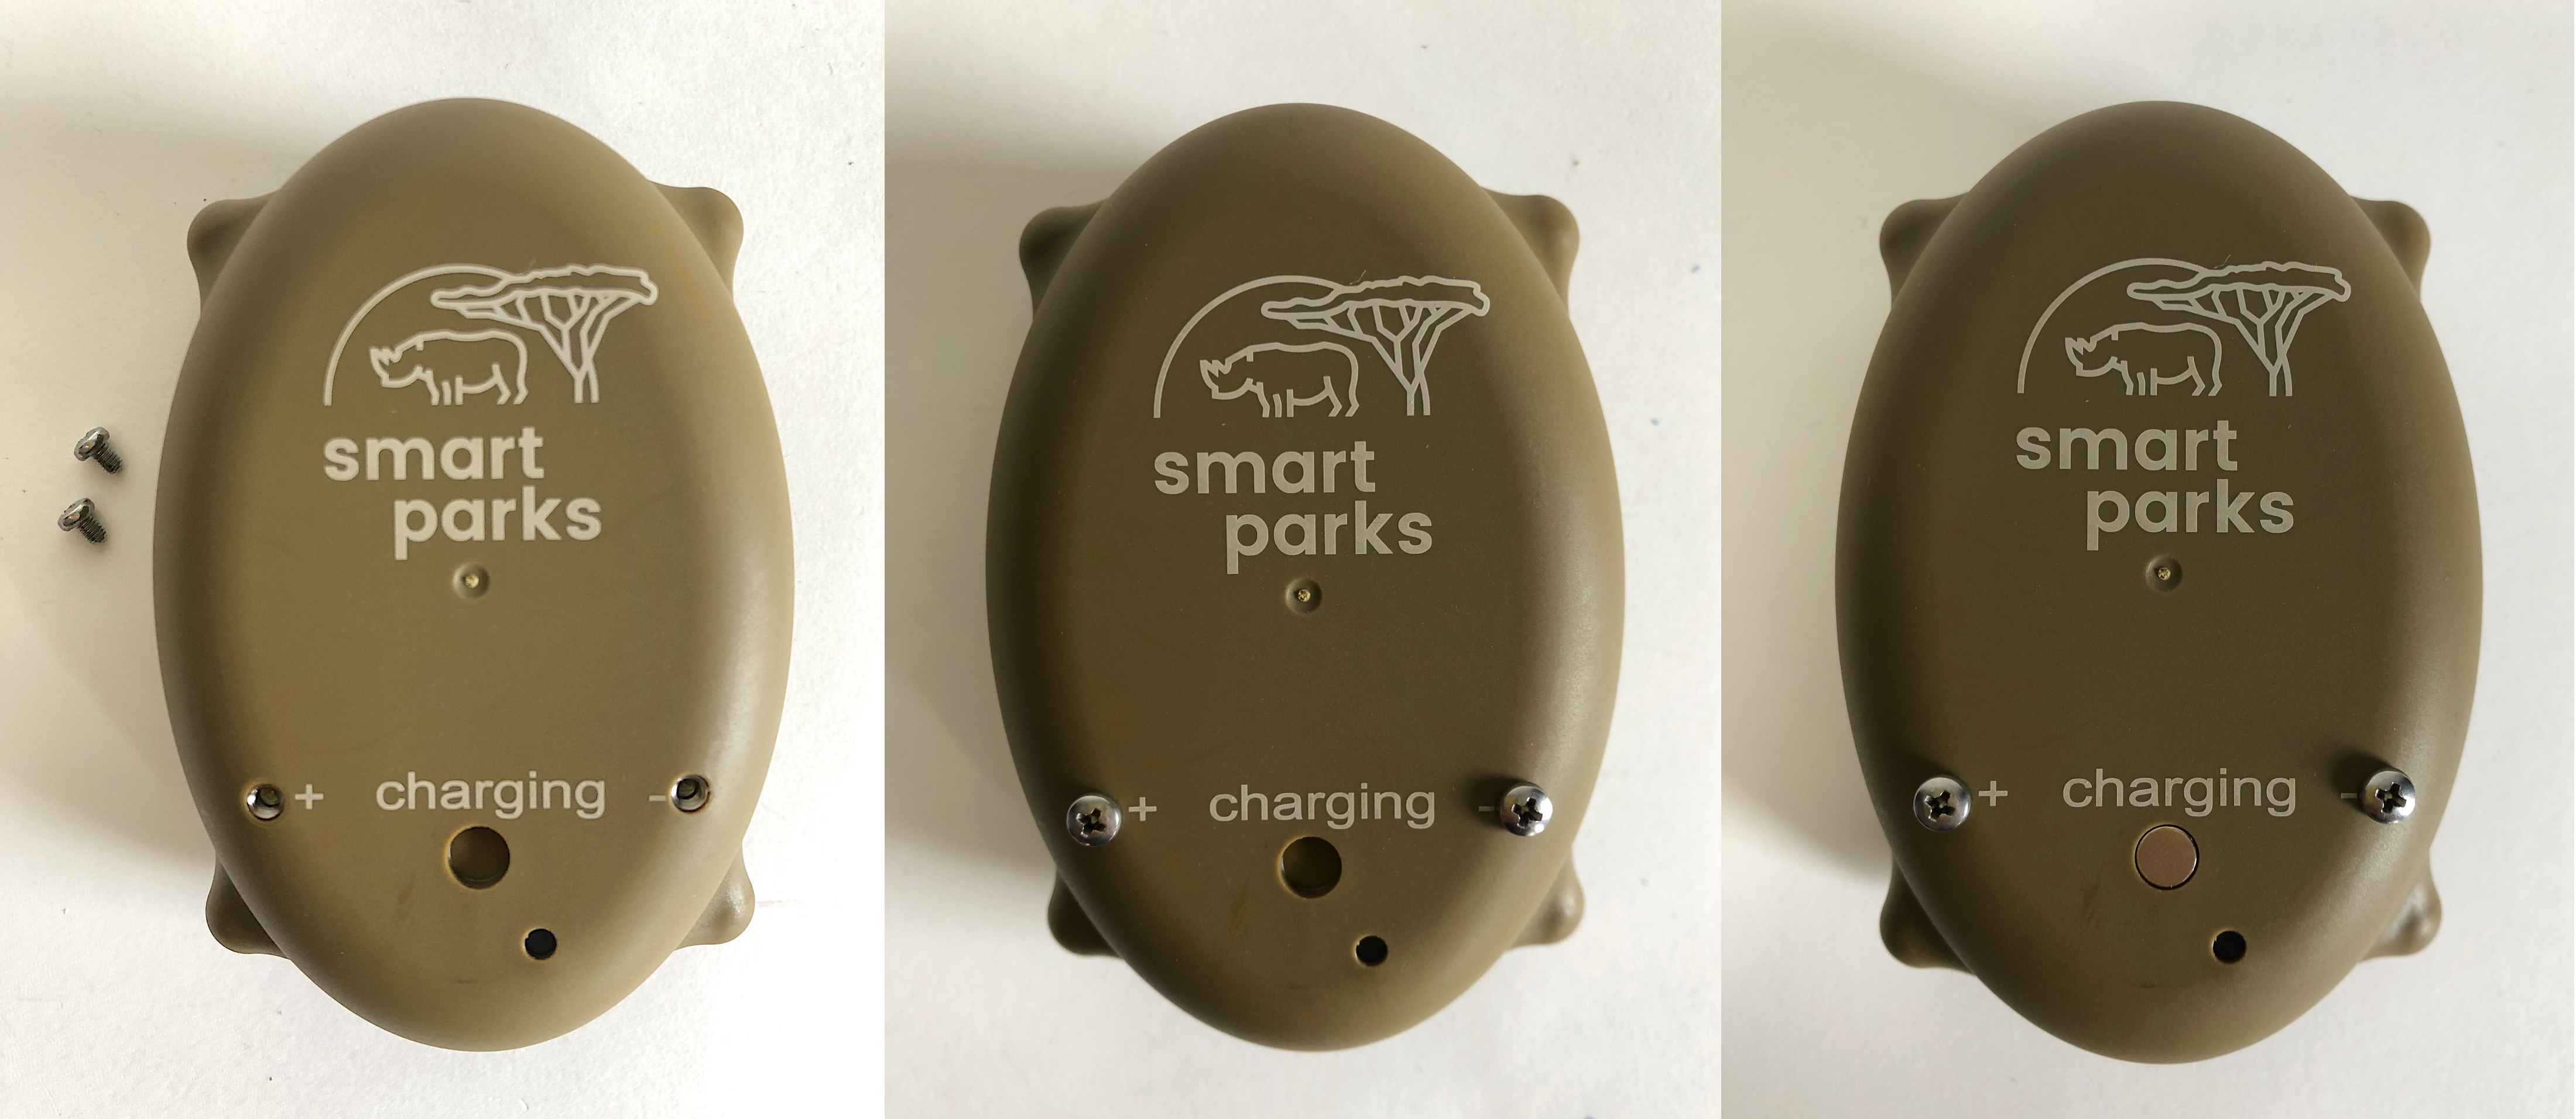
Attach 2 M3*4 screws to the + and - on the front of the device, these are the screws used for charging. As a final step the magnet can be placed to make the device dormant.
